
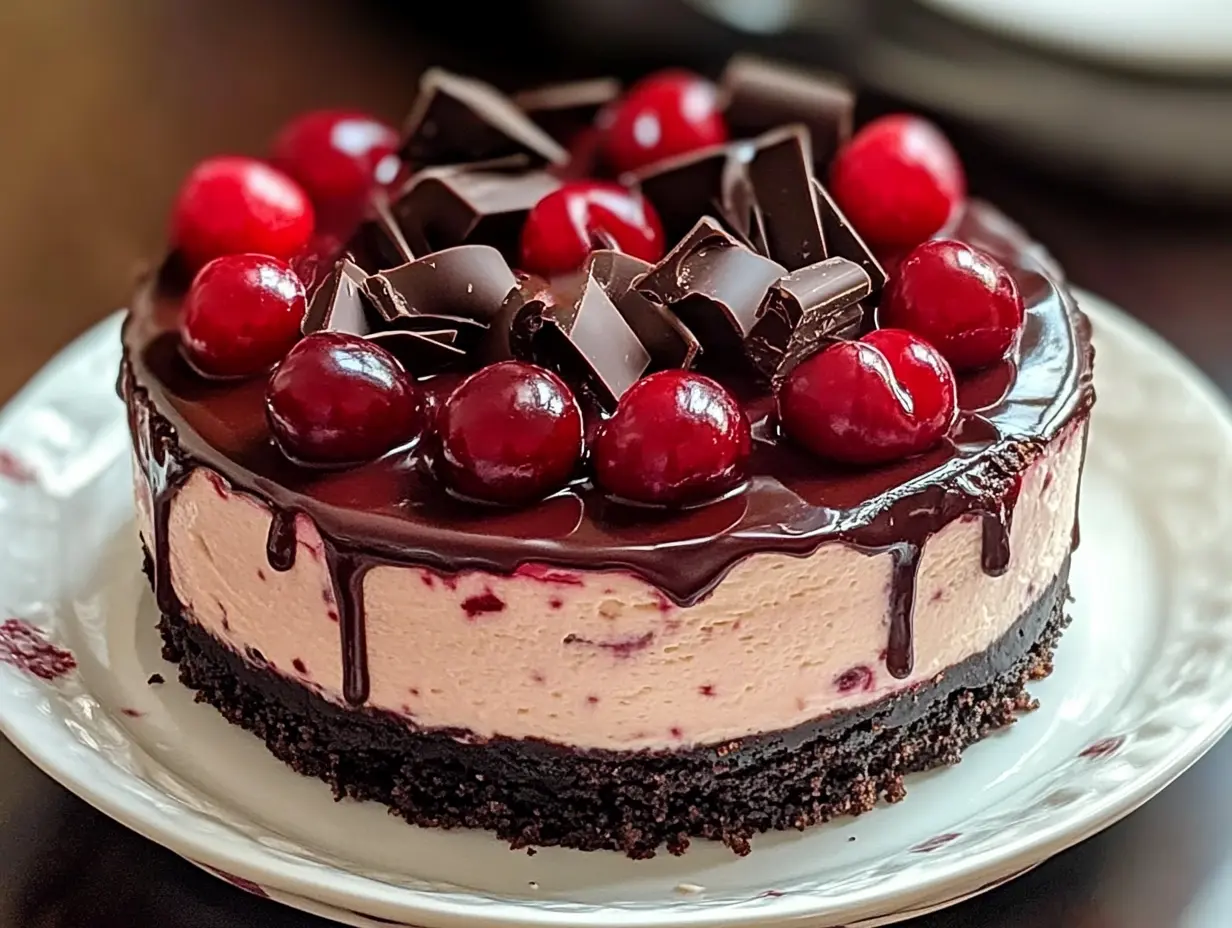
Imagine a dessert that marries the smooth, creamy indulgence of cheesecake with the irresistible richness of chocolate and the bright, tangy burst of cherries. This is not merely a dessert—it’s an experience. Whether you’re hosting a lavish dinner party, celebrating a holiday with loved ones, or simply treating yourself after a long day, a slice of cherry chocolate cheesecake promises to enchant your taste buds and leave a lasting impression on every guest. In this article, we’ll explore the magic behind this dessert, break down the recipe and its steps, discuss creative variations to suit every palate, offer tips on presentation and storage, and answer some of the most common questions. Let’s dive in!
The Allure of a Classic Combination
There’s something undeniably special about the union of chocolate and cherries. For centuries, these two ingredients have been celebrated separately for their luxurious qualities—and together, they create a flavor profile that is both sophisticated and comforting. The deep, velvety character of chocolate finds a perfect counterbalance in the tart, lively notes of cherries. Think of traditional delights like the Black Forest cake, where these ingredients come together in a symphony of taste and texture.
The pairing works on many levels. Chocolate, with its bittersweet complexity, enriches desserts with a depth of flavor that’s hard to resist. Cherries, on the other hand, add a playful contrast with their vibrant acidity and natural sweetness. When blended into the smooth canvas of a cheesecake, these elements harmonize beautifully. The result is a dessert that is rich yet refreshing, indulgent yet light, and ultimately unforgettable.
Moreover, this flavor duo isn’t limited to one culture or style. From European classics to modern fusion desserts, chocolate and cherries have found their way into many culinary traditions. They are used in sauces, fillings, and even beverages—each time proving that when these flavors meet, magic happens. In our cherry chocolate cheesecake, every bite is a celebration of this time-honored combination, making it a perfect choice for any occasion, whether it’s a festive celebration or a quiet evening treat.
The Ultimate Recipe: Cherry Chocolate Cheesecake
Now that you’re inspired by the sheer appeal of this dessert, let’s roll up our sleeves and get into the nuts and bolts of making your very own cherry chocolate cheesecake. Below, you’ll find a comprehensive guide covering everything from the ingredients and necessary equipment to step-by-step preparation instructions.
Essential Ingredients and Equipment
Before you begin, it’s important to gather all your ingredients and kitchen tools. This ensures a smooth cooking experience and a flawless final product.
For the Crust:
- 2 cups chocolate cookie crumbs: These form a robust, flavorful base that’s key to supporting the cheesecake filling.
- ½ cup unsalted butter (melted): The butter acts as a binding agent, helping the crumbs stick together for a firm, delectable crust.
For the Cheesecake Filling:
- 24 oz cream cheese (softened): The star of the show, cream cheese provides that signature, creamy texture we all love.
- 1 cup granulated sugar: Balances the tanginess of the cream cheese with just the right amount of sweetness.
- 1 cup sour cream: Introduces a subtle tang that enriches the overall flavor profile.
- 4 large eggs: Essential for binding the filling and ensuring a smooth, set texture.
- 1 tsp vanilla extract: A small touch that elevates the flavor, enhancing both the sweetness and aroma.
- 1 cup semi-sweet chocolate chips (melted and slightly cooled): This ingredient infuses the filling with deep, rich chocolate notes.
For the Topping:
- 1 (21 oz) can cherry pie filling: This ready-to-use topping provides a burst of sweet-tart flavor that perfectly complements the rich chocolate and creamy cheesecake.
- Optional garnishes: Fresh cherries, chocolate shavings, or even a drizzle of extra chocolate syrup can add a final touch of elegance.
Essential Equipment:
- 9-inch springform pan: Ideal for baking and ensuring a clean, easy release of your cheesecake.
- Mixing bowls: A variety of sizes will help you combine ingredients with ease.
- Electric mixer: While not strictly necessary, an electric mixer ensures a perfectly smooth filling.
- Oven: Your trusty oven is the secret weapon behind the perfect bake.
With all your ingredients and tools at hand, you’re ready to embark on creating a dessert that’s sure to impress.
Crafting the Perfect Cherry Chocolate Cheesecake: A Step-by-Step Guide
The process of creating this cheesecake is straightforward, yet every step is vital in achieving a flawless final product. Follow these detailed instructions to ensure your dessert turns out just right.
Step 1: Preparing the Crust
- Preheat Your Oven: Set your oven to 325°F (160°C) to get it ready for baking.
- Mix the Crust Ingredients: In a medium-sized bowl, combine the chocolate cookie crumbs with the melted unsalted butter. Stir until the mixture is uniformly wet and crumbly.
- Press Into the Pan: Transfer the crumb mixture into your 9-inch springform pan. Using the back of a spoon or the flat bottom of a glass, press the crumbs firmly and evenly into the base to form a compact, even layer.
- Pre-Bake the Crust: Place the pan in the preheated oven and bake for about 10 minutes. This pre-baking step helps set the crust, ensuring it remains sturdy when you add the filling later. Once baked, remove the pan from the oven and set it aside to cool.
Step 2: Creating the Cheesecake Filling
- Beat the Cream Cheese and Sugar: In a large mixing bowl, add the softened cream cheese and granulated sugar. Using an electric mixer, beat the mixture on medium speed until it is completely smooth and free of lumps.
- Incorporate the Sour Cream and Vanilla: Add the sour cream and vanilla extract to your cream cheese mixture. Continue beating until all the ingredients are fully integrated.
- Add the Eggs: Crack in the eggs one at a time, beating the mixture after each addition. This gradual incorporation helps maintain a silky texture and prevents the batter from curdling.
- Mix in the Melted Chocolate: Finally, gently fold in the slightly cooled, melted chocolate chips. Stir until the chocolate is evenly distributed throughout the filling. The result is a beautifully marbled mixture where the richness of the chocolate complements the tangy, creamy base.
Step 3: Assembling and Baking
- Pour the Filling Over the Crust: Carefully transfer your cheesecake filling into the cooled crust, smoothing the top with a spatula to ensure an even layer.
- Bake the Cheesecake: Place the pan back into your preheated oven and bake for approximately 50–60 minutes. The key here is to watch for a set center that still has a slight jiggle—this is a sign of a perfectly baked cheesecake that will firm up as it cools.
- Cool Slowly: Once baked, turn off the oven and crack the door open slightly. Allow the cheesecake to cool in the oven for about 1 hour. This slow cooling process is crucial for preventing unsightly cracks from forming on the surface.
- Chill Thoroughly: After cooling to room temperature, cover the cheesecake and refrigerate it for at least 4 hours, or ideally overnight. Chilling not only enhances the flavor but also allows the cheesecake to set firmly, making it easier to slice and serve.
Step 4: Adding the Cherry Topping
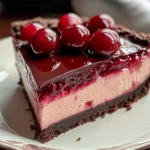
- Spread the Cherry Pie Filling: Once the cheesecake has cooled and set in the refrigerator, remove it from the pan. Evenly distribute the cherry pie filling over the top of the cheesecake. This topping layer adds a delightful burst of flavor and a vivid contrast to the rich chocolate and creamy filling.
- Optional Garnishes: If you’re feeling extra creative, add fresh cherries or a sprinkle of chocolate shavings on top. These final touches not only enhance the visual appeal but also contribute additional layers of flavor.
And there you have it—a show-stopping cherry chocolate cheesecake that’s ready to be devoured!
Creative Variations to Suit Every Taste
While the classic recipe above is a masterpiece in its own right, the beauty of cherry chocolate cheesecake lies in its versatility. There are countless ways to tailor this dessert to your personal preferences or dietary needs. Here are some inspiring ideas for creative twists:
1. Experimenting with Different Chocolates
- Dark Chocolate: For those who appreciate a more intense, slightly bitter flavor, replace the semi-sweet chocolate with dark chocolate. This change intensifies the richness of the dessert and pairs beautifully with the tanginess of the cherries.
- Milk Chocolate: If you prefer a sweeter, creamier experience, milk chocolate is a great choice. It brings a smoother flavor that can balance the tartness of the cherries even more gracefully.
- White Chocolate: For a decadent twist, consider using white chocolate. Its delicate sweetness and creamy texture create a subtle, luxurious backdrop against which the cherry topping truly shines.
2. Alternative Crust Options
- Graham Cracker Crust: Swap out the chocolate cookie base for graham cracker crumbs. The buttery, slightly tangy flavor of graham crackers offers a classic contrast to the rich filling.
- Nut-Based Crust: For a gluten-free or lower-carb alternative, try using finely ground nuts such as almonds or pecans. A nut-based crust introduces a pleasant crunch and a toasty flavor that complements both the chocolate and cherry components.
- Oreo Crust: For an extra dose of indulgence, crushed Oreo cookies can serve as an alternative base. The combination of chocolate and cream in Oreos adds an extra layer of decadence to your cheesecake.
3. Incorporating Other Fruits
Although cherries are the star, you might consider playing with other fruits:
- Berries: Fresh raspberries, strawberries, or blueberries can be mixed into the filling or used as a topping. Their natural tartness offers a refreshing counterpoint to the richness of the cheesecake.
- Citrus Zest: A hint of lemon or orange zest mixed into the filling can provide a subtle zing, making the dessert feel even more vibrant.
4. Flavor Enhancers and Spices
A few extra ingredients can elevate your cheesecake to a new level of sophistication:
- Espresso or Coffee: A dash of espresso powder or a spoonful of strong brewed coffee can intensify the chocolate’s depth, adding a mocha-like quality.
- Warm Spices: A sprinkle of cinnamon or nutmeg mixed into the batter can infuse the dessert with a cozy warmth—perfect for cooler months.
- Liqueurs: For an adult twist, add a splash of cherry liqueur or even vanilla bourbon to the filling. This will deepen the flavor profile and add a subtle complexity that makes the dessert even more enticing.
These variations allow you to make the recipe your own. Whether you’re catering to a crowd with diverse tastes or simply experimenting in your kitchen, these creative twists ensure that your cherry chocolate cheesecake will always be a conversation starter.
Serving and Presentation: Making Every Slice a Masterpiece
No dessert is truly complete without an appealing presentation. The visual allure of your cherry chocolate cheesecake is just as important as its flavor. Here are some ideas to elevate your presentation:
Garnishing Ideas
- Fresh Fruit: A few fresh cherries strategically placed on top or around the edges add a burst of color and emphasize the fruity flavor.
- Chocolate Accents: Consider using a vegetable peeler to create delicate chocolate curls or shavings from a block of chocolate. A light dusting over the top can lend an elegant finish.
- Whipped Cream: A dollop of lightly sweetened whipped cream on each slice provides a delicate contrast to the rich filling and enhances the overall indulgence.
Plating Suggestions
- Classic Slices: Serve your cheesecake in generous slices on a white plate to highlight its beautiful layers. A drizzle of extra cherry syrup or chocolate sauce on the side can add flair.
- Rustic Boards: For a more casual, yet stylish presentation, serve slices on a wooden board accompanied by small bowls of extra toppings (fresh berries, nuts, or a drizzle of honey) for guests to customize their dessert.
- Accompaniments: Pair your cheesecake with complementary sides such as a scoop of vanilla ice cream, a dusting of cocoa powder, or even a sprig of mint for a pop of color.
Beverage Pairings
- Coffee or Espresso: The slightly bitter notes of a good coffee or espresso contrast beautifully with the sweetness of the dessert.
- Light Red Wines: A glass of Pinot Noir or Merlot can elevate the experience, its subtle tannins playing off the richness of the chocolate.
- Dessert Wines: For an extra indulgent pairing, try a sweet dessert wine like Port or Moscato, which complements the tart cherry topping splendidly.
By taking the time to plate your dessert thoughtfully, you not only enhance its visual appeal but also create an immersive dining experience that heightens every bite.
Nutritional Insights: Indulge Mindfully
While cherry chocolate cheesecake is undoubtedly a luxurious treat, it’s always good to be aware of its nutritional content—especially if you’re planning to serve it at a gathering where guests might appreciate some details.
A standard slice (assuming you divide the cheesecake into 12 generous servings) roughly contains:
- Calories: Approximately 350–400 calories per slice.
- Fat: Around 25–30 grams, primarily from the cream cheese and butter.
- Carbohydrates: Approximately 30–35 grams, largely contributed by the cookie crust and sugar.
- Protein: Roughly 5–7 grams, thanks to the eggs and cream cheese.
- Sugar: An estimated 20–25 grams, though this can vary if you substitute ingredients.
If you’re looking for ways to lighten up the dessert without compromising its flavor, consider these adjustments:
- Lower-Fat Dairy: Use low-fat cream cheese or even Greek yogurt in place of some or all of the cream cheese.
- Sugar Alternatives: Experiment with natural sweeteners like stevia or monk fruit extract.
- Healthier Fats: Replace butter in the crust with alternatives such as coconut oil or avocado oil to achieve a slightly lighter fat profile.
Remember, while this dessert is rich and indulgent, enjoying it in moderation—as part of a balanced diet—ensures that every bite is savored without worry.
Storage, Shelf Life, and Frequently Asked Questions
After you’ve created your masterpiece, proper storage is key to preserving its flavor and texture. Here’s how to make sure your cherry chocolate cheesecake stays as delectable as the day you baked it.
How to Store Your Cheesecake
- Refrigeration:
- Once the cheesecake is assembled and garnished, cover it tightly with plastic wrap or transfer any leftovers to an airtight container.
- Keep it in the refrigerator for up to 5 days. This not only preserves its freshness but also allows the flavors to meld beautifully.
- Freezing for Extended Enjoyment:
- If you need to store your cheesecake for longer periods, freezing is a great option. Wrap the whole cheesecake (or individual slices) in plastic wrap, followed by a layer of aluminum foil to prevent freezer burn.
- It can remain frozen for up to 2 months. When you’re ready to enjoy it, thaw the cheesecake overnight in the refrigerator to maintain its texture and flavor.
Frequently Asked Questions
Q: How can I prevent cracks from forming in my cheesecake?
A: Cracks often develop due to rapid temperature changes or overmixing the batter. To avoid this, ensure you cool your cheesecake gradually by leaving it in the oven with the door slightly ajar for about an hour after baking. Also, mix your ingredients just enough to combine them smoothly—overmixing can incorporate too much air, leading to cracks.
Q: Can I use frozen cherries for the topping instead of canned cherry pie filling?
A: Absolutely! If you prefer fresh or frozen cherries, thaw and drain them well before using. This prevents excess moisture from altering the texture of your topping.
Q: Is it possible to make a dairy-free version of this cheesecake?
A: Yes, you can substitute regular cream cheese with a non-dairy alternative and use a dairy-free butter substitute for the crust. There are many excellent plant-based products available that can mimic the creaminess and flavor you’re looking for.
Q: How do I know when the cheesecake is fully baked?
A: The edges of the cheesecake should be set while the center retains a slight jiggle. This residual movement is ideal since the cheesecake will firm up as it cools. Overbaking can lead to a dense, cracked surface, so it’s best to err on the side of caution.
Q: Can I prepare this cheesecake ahead of time?
A: In fact, many chefs recommend making the cheesecake a day or two in advance. This not only saves time on the day of your event but also allows the flavors to meld, resulting in an even more delicious dessert.
Conclusion: A Dessert That Celebrates Life
Cherry chocolate cheesecake is more than just a dessert—it’s a celebration of flavor, texture, and the joy of culinary creativity. From its perfectly baked, velvety filling and sumptuous chocolate swirls to the vibrant, tangy cherry topping, every element has been carefully crafted to create a dessert that is as impressive as it is delicious.
Whether you’re planning a special celebration or simply looking for a way to treat yourself, this cheesecake is sure to become a favorite. Its versatility means you can always tailor it to suit your personal tastes—experiment with different types of chocolate, try alternative crusts, or incorporate additional fruits and spices to create your own signature version. With thoughtful presentation and mindful storage, this dessert can be enjoyed time and time again.
So go ahead and indulge in the luxurious combination of creaminess, chocolate, and cherries. Each slice of cherry chocolate cheesecake promises not just a treat for your palate but also a moment of pure, blissful enjoyment. Let it remind you that life’s sweetest moments are meant to be savored—and that sometimes, the simplest ingredients, when brought together with care, create the most memorable experiences.
Enjoy every bite, share it with loved ones, and allow this dessert to become a cherished part of your culinary repertoire. After all, in every celebration and every quiet evening at home, a slice of cherry chocolate cheesecake is the perfect excuse to treat yourself to something truly extraordinary.
Cherry Chocolate Cheesecake
- Author: Madilyn
- Total Time: 1 hour and 15 minutes
- Yield: 10-12 1x
Description
Indulge in the irresistible combo of creamy cheesecake, rich chocolate, and sweet cherries. This dessert is perfect for any celebration or a special treat for yourself!
Ingredients
🌟 For the Crust:
- 2 cups chocolate cookie crumbs
- ½ cup unsalted butter (melted)
🌟 For the Filling:
- 24 oz cream cheese (softened)
- 1 cup granulated sugar
- 1 cup sour cream
- 4 large eggs
- 1 tsp vanilla extract
- 1 cup semi-sweet chocolate chips (melted and slightly cooled)
🌟 For the Topping:
- 1 (21 oz) can cherry pie filling
- Optional: Fresh cherries or chocolate shavings for garnish
Instructions
Prepare the Crust:
- Preheat your oven to 325°F (160°C).
- Mix the chocolate cookie crumbs with the melted butter until fully combined.
- Firmly press the mixture into the bottom of a 9-inch springform pan.
- Bake for 10 minutes, then set aside to cool.
Make the Filling:
- In a large bowl, beat the cream cheese and sugar together until smooth and creamy.
- Add the sour cream and vanilla extract, mixing until well blended.
- Incorporate the eggs one at a time, ensuring each egg is fully mixed before adding the next.
- Gently fold in the melted chocolate until evenly combined.
Bake the Cheesecake:
- Pour the filling over the cooled crust.
- Bake for 50-60 minutes, or until the center is set but still slightly jiggly.
- Turn off the oven, crack the door slightly, and let the cheesecake cool in the oven for 1 hour to prevent cracks.
Add the Cherry Topping:
- Once the cheesecake is completely cooled, spread the cherry pie filling evenly over the top.
Chill and Serve:
- Refrigerate the cheesecake for at least 4 hours or overnight for the best results.
- Garnish with fresh cherries or chocolate shavings before serving, if desired.
Notes
- Room Temperature Ingredients: Use room-temperature cream cheese, eggs, and sour cream to ensure a smooth, lump-free filling.
- Prevent Cracks: Let the cheesecake cool in the oven with the door slightly ajar for 1 hour to avoid cracks on the surface.
- Prep Time: 15 minutes
- Cook Time: 60 minutes